Saturday, September 23, 2006

Children's Books Display - Part 8


This monkey was not part of the original concept, but the two alcoves also had beams that ran front to back, as well as the ones making up the left to right archways. I decided to make a couple additional characters to fill up this short space. I also new that I wanted to do a window display to bring attention to the installation once it was up, and that characters similar to those in the actual installation should be part of it. I didn't want to make a bunch of additional characters that wouldn't be used afterwards if I could help it, so I tried to think of some that could do double duty, first appearing in the window display and then later being moved onto the permanent installation. They also had to be characters whose initial absence in the store installation wouldn't be apparent.

The monkey seemed like a good character type who could perform this double duty. Whimsical, and very kid-friendly, I thought he'd be a draw to get kids to want to come into the store. I designed him with the double duty in mind, giving him a hooked prehensile tail that he could hang upside down from a vine from in the window, and then later be seated on a log in the permanent installation, where he'll also be given a paper hat.

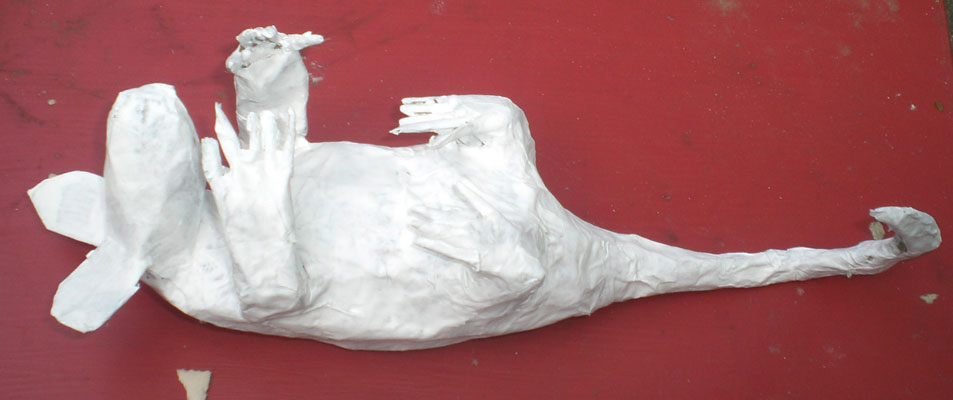
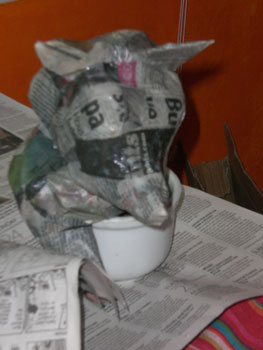
Again, photographic documentation of his construction has been lost. This was actually one of the easiest characters to put together. His limbs and tail were made from a discarded garden hose, which was inserted through a breadloaf-like shape made of newspapers for his body (which also has a wooden block inside so that the tree trunk can be screwed to him later). His feet are two wads of newspaper, his hands stiff, heavy gauge florist's wire. His head was paper mached separately, and consisted of balled up newspaper and ears cut from a cereal box. Once the paper mache was dry, the head was attached to the body.

After this he was primed and painted. As I said in an earlier post, the priming tends to show all of the mistakes. This makes any characters that are painted white, less forgiving than darker, or patterned colors. A lot of smoothing out had to be done again and again to the areas that would be left painted white. The monkey's nose was made from paper pulp, just like the bear's, and his eyes are plastic animal eyes. I ended up sticking with black beady eyes for almost all of the characters as it made the characters seem friendlier.

The copy of "Caps For Sale" that the monkey is reading was made in the same manner as "Blueberries for Sal" for the bear.

The tree stump is a cheap plastic flower pot that annuals come in at any store, covered with paper mache and painted. Wooden blocks are screwed to the interior near the base, so that it can later be mounted to the installation.


Children's Books Display - Part 7


I worked on a few more elements simultaneously after the bear. The ant was completed first. Again, documentation of its creation was lost, but as you can see, he was pretty simple. His body was essentially a snowman like construction of three crumpled balls of newspaper. His limbs were made from stiff, heavy gauge, florist's wire, his feet are cut from some leftover wooden trim, so that they could be screwed down to the bridge he'd later be standing on. The antennae are simply painted thin florist's wire, and the eyes small plastic animal eyes.

I ended up making a second book for him to carry. The two books are Maurice Sendak's "The Nutshell Library" (actually a boxed set of four books, but I made it look like one) and "Stuart Little" by E.B. White.

Unlike the books made for the opossum and the bear, these books were simple reduced color copies of the cover mounted over small cardboard rectangles which were wrapped with plain white paper.

Children's Books Display - Part 6


The bear was the next character I tackled, because it was next in line in the right to left order of the display, and because it was to be the largest part of the display after the tree.

Sadly, the bear was one of the most exhaustively documented pieces of this installation, and part of the batch of photos which were deleted.

Initially, I marked out the size I wanted the bear to be (roughly a bit taller than 2 feet) on a large sheet of cardboard. Then I drew out an outline of the bear on the cardboard (front view) cut it out and built it up using wadded up batches of newspaper, some of the same thick florist's wire I used for the opossum's tail as support for the arms and legs, and a wooden block in the bear's behind, which was going to be screwed to the same base as the tree. Once I had a rough bear shape, I started to paper mache.


After the initial paper macheing was completed, I decided that the bear's snout was too teddy bear like, and so built it up into a blockier form, a bit closer to the initial concept sketch.

The paint scheme for the bear was something I was never satisfied with. I didn't want him to be painted like a real bear, as he was more whimsical looking. At the same time I didn't want his paint scheme to be too far removed from reality (I'd toyed with two shades of blue, two shades of green, and red and white) because the raccoon was fairly realistic in nature, and I thought the juxtaposition might seem jarring. I'd settled on yellow, but then decided he looked too much like Disney's version of Winnie the Pooh, so I dry brushed some umber over it, which with the yellow undercoating gave him a nice caramel or honey sheen, which seemed about right.

Originally, the bear's paws were painted on, but I thought I could do better. Using a mixture of newspaper pulp I made by tossing it into the blender with some water, and the paper mache paste, I sculpted onto the bear's muzzle a pretty good nose. I used the same pulp to build up the pads on his feet. This pulp mixture was a life saver many times on this project.

His eyes were plastic animal eyes. I opted for the plain black ones rather than more realistic brown one's with black pupils, as I felt the real ones made him look like he'd just sat on a bee, and I wanted to give his face a softer appearance.

The copy of "Blueberries For Sal" is a fake book I constructed from scratch. A reduced color photocopy of the cover was glued over a cardboard "hardcover." Blank pieces of paper were glued inside to create the illusion of pages, and an interior spread from the book was also photocopied at a reduced rate and placed over the blank pages, creating an illusion of a real book. The book was then screwed to the bear's hands through the end papers so that the screws would not be visible.

Friday, September 22, 2006

Children's Books Display - Part 5

Back to the tree...


As you can see, the tree has been primed and painted. All the leaf stems are in place and I've begun to paint those a dark green to match the color of the leaves which can be seen on the table below the tree. A large piece of black felt has been glued into the hole on the tree, hiding the base of the branches and giving the hole some cartoonish depth. The bees and their hive have also been painted and attached to the tree, though at this point their eyes have not been affixed.


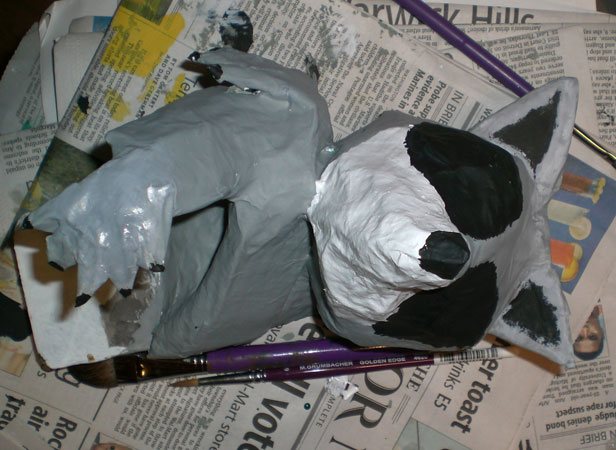
Eyes have been added to the raccoon. These were simply eyes made for teddy bears, plugged into his head and set in place with glue. The white spots on the raccoon and the tree would all be touched up later.


aside from making, attaching, and then painting the nearly 100 leaf stems, was having to make the leaves themselves. They were all cut from sheets of that flexible foamlike packing material, of about 1/4 inch thickness. Their size was uniform. I used a template cut from a cereal box, and simply held it against the foam sheet as I cut the leaf out with scissors.


Then all the leaves had to be painted, which was a multi-step process, and since I was working on the kitchen table, done in batches of about a dozen at a time. Each side had to be painted dark green, as did the edges--often with two coats. Like I said; tedious.


Then, after this base coat was completed, the veins were added, on both sides, in this beautiful industrial green, pretty much the same shade you see in official buildings everywhere. I generally completed the painting of an entire batch before moving on to the next one, rather than do all the base coats, then all of the veins, and risking any damage occurring to the leaves from the paint sticking to each other due to the summer humidity, which became a problem for much of this project, really dragging out the drying time, particularly when it involved the paper mache.


after each batch of leaves was completely painted, I began to glue them onto the stems on the tree, sequentially, one branch at a time, so that I didn't accidentally miss a stem along the way. Before I glued them, I inserted a skewer carefully into the base of each leaf, where the stem would be inserted. This was done to control the path of the stems, and to avoid the stems tearing through the sides of the leaves, which happened a few times anyway, necessitating paint touch ups.


Eventually, all the leaves were in place, the stems bent at an angle, and the tree looked pretty good. You can see by the time change outside the windows that this was a lengthy process. I think it took two or three days.


Here are the completed bees with their google eyes in place.


Here are the completed birds. I painted them, then screwed them down onto the branch through their backs, re-paper mached over the screws, primed and painted over it. It seems like a chore, but it was far easier to do it this way than to try and paint them completely, while they were attached to the branch. Incidentally, they are the only characters who ended up simply with painted eyes.


Here is the opossum completed, with its tiny copy of Shel Silverstein's "The Giving Tree" as it is situated in the completed installation.

Children's Books Display - Part 4

In order to make the whole process easier to convey, I've had to take liberties with the actual order that things were done in order to create a sense of linearity. The fact of the matter is that I was often working on several elements simultaneously. This way I didn't waste a lot of time in waiting for things to dry before I could do further work on them. A large chunk of time spent on this project involved waiting for paper mache to dry, or paint, or glue, so it made sense to have several things going at once.

At the same time I was working on the tree, I was also working on the creatures which would be inhabiting it. This included a raccoon, two birds, two bees and a hive, and an opossum.


The raccoon ended up being pretty easy. I only had to build his head, arms, and upper torso, since he'd be emerging from the hole in the tree, resting on the rim as if he were leaning on a window sill watching the world going by around him.

For the paper mache I used a basic formula of boiling water, then adding in a diluted mixture of water and flour which was then heated until it became a thick paste. Once this cooled to room temperature, it was easy to work with. The newspaper was torn into strips of various length and used accordingly.


After the paper macheing was completed, everything had to be primed. This step also revealed any flaws in the paper macheing; areas where the newspaper had lifted, or created holes, or areas that just weren't smooth enough. This is why there are newspaper patches on the primed raccoon -- touch-ups, which were then primed before...


...the actual painting. Here's the painted raccoon before his eyes were added.


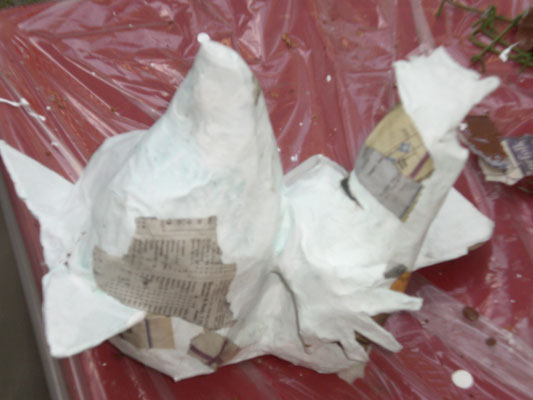
Here's the rough construction of the other tree animals. Left to Right: The opossum, two birds, bee hive, and bees. They were essentially balled up newspaper and masking tape, with cardboard accents. The opossum had a heavy gauge florist wire tail, and thinner wire for the hands which were added later in the process.

Sadly, this is one of the few images I have to offer of the basic construction stage of the characters created for this display. I took plenty of pictures of each stage of the others, but my son accidentally erased all of the pictures from our digital camera before I had a chance to download them onto my computer. The same process applied to most of the others. A frame was made of cardboard and newspaper, with wire as necessary, then covered with paper mache.


Here are the bees with cereal box wings attached, being paper mached to thin florist wire, which is attached to the bee hive itself. The bee hive is essentially a couple of balled up pages of newspaper, with a sheet of newspaper wrapped around them. Once dry, and with a thick shell, a hole was cut in the hive and the interior balls of paper were removed through this hole, making the whole thing hollow.


Here is the opossum at it's initial priming stage. This was the first animal I began to put together and nearly the last to be completed. Trying to paper mache all of those fingers and toes, none of which was quite an inch long was difficult and tedious, so I was constantly deferring its completion. In the end it was the character I was least happy with, and the one with the most visible errors. Fortunately its placement in the tree, and the fact that it would later be holding a book, masked a lot of the mistakes from view.

Children's Books Display - Part 3

I decided to begin with the largest object, which happened to be the tree, and work my way right. My reasoning was that it would be easier to scale everything accordingly if I worked my way down in size.


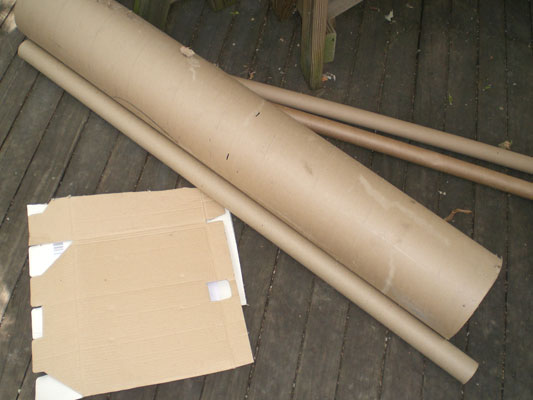
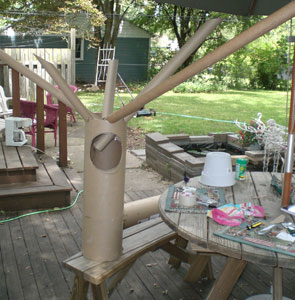
The raw materials which made up the tree were a bunch of thick cardboard tubes of varying thickness, and some cardboard sheets which would be used for the roots.


Since the tree could not be any taller than four feet at it's highest point, I tried to vary the length and angle of the branches in order to create the illusion of the tree having more height than it actually did. Here, I simply positioned the branches on the trunk, using a simple method of notching the branches, where they meet the trunk, with a box cutter and then slotting them onto the trunk..


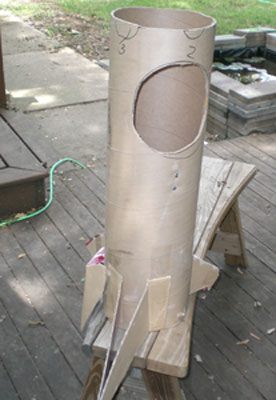
After numbering the branches, and marking their locations, I screwed some wooden blocks onto the inside base of the trunk. A platform would later be screwed onto the base of the tree (anchored to these blocks). This platform would then be screwed down to the top of the archway in the store.


Next a hole was cut into the trunk where the raccoon would be placed. The two screws seen just below the hole mark where another wooden block was mounted inside. The raccoon will be mounted to this block.


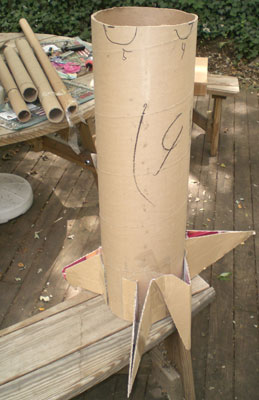
Frames for the roots were cut from cardboard boxes and affixed to the side of the trunk with packing tape. You can see the placement markings for each of the branches.


Before starting the paper mache process, I repositioned the branches one more time, in order to see if any of them interfered with the interior of the hole and where the raccoon would be placed. A couple of them were trimmed at the bottom to such a length that didn't compromise stability, but short enough that I could camouflage their presence later on.


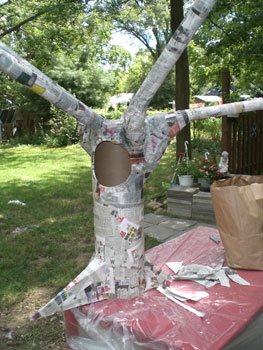
Once again, the branches were removed and the trunk was paper mached. This of course meant that the numbered markers for the branches was no longer visible.


Thanks to digital photography, I was able to recreate the placement of the branches anyway, though I ended up repositioning them slightly anyway. These then were paper mached to the trunk. Wadded up pages of newspaper were paper mached beneath a couple of the branches where they meet the trunk in order to give them a more natural appearance. This tree was by no means meant to resemble a real tree, but even as a stylistic tree, the branches merely jutting out in their natural tube shapes seemed jarring, unnatural, and in no way disguised the elements from which they were created.


Once everything was paper mached, and dried, the tedious process of attaching the leaf stems began. The stems themselves were made from medium heavy florist wire (I don't recall the specific gauge). I cut the wire into roughly 4-inch lengths, and twisted an angled c-shaped curve at one end. This curve was then taped to the branch with masking tape and then covered with paper mache for strength and stability. Since this tree was stylistic, I decided to space them evenly around the branches. There were about 98 of these stems, so the work seemed somewhat endless.

Children's Books Display - Part 2

Here's the area of the store that I designated for the children's display. The two alcoves had always been pretty much dead spaces no matter what the store used them for. No one ever went in them. The one on the left had been used for a small collection of Spanish language books, and sale books. About six months ago, I shifted the Young Adult Fantasy to this area, as well as the books of folktales and legends. The table was used to display items from the various sections of the children's book collection. Still, the problem remained that the area needed to be unified, as the children's books were now in two alcoves a large display area seen in the center foreground, as well as a shelf to the right (not visible in this photo) and there needed to be a way to make the alcoves more inviting, especially to children.

I began toying with the idea of creating some sort of 3D installation piece to connect the two alcoves, and get kids to not only want to linger in the alcoves beneath it, but to want to keep coming back to the store, even if only on the pretense of seeing the display.


The initial sketches were simply attempts at getting comfortable with the architecture, and simply playing with shapes and forms to unify them, such as the cloud/shrub form in the top sketch meant to somehow bridge the two arches/alcoves and bring them together. Several animal and creature ideas were played with and eventually discarded, such as a large bird and a dragon.

I initially liked the idea of a dragon that would look down at the kids from its perch, its face and tail tantalizingly just out of their reach. The reality though was that the width of the space atop the archway was only seven inches wide, which would have given the dragon grotesque proportions, or given me an engineering problem I wasn't willing to wrestle with, which would be on figuring out a way to have a much larger figure safely perched on such a narrow space. I opted to reduce the scale of the characters to something more suited to the narrow dimensions of the space.

I then decided on a literal bridge, and the rest fell into place pretty quickly. There was originally going to be a number of characters suspended from the air as well including birds, a rocket, a blimp, a fairy, and a man on a flying carpet. I realized that their spinning on the end of a piece of fishing line, or simple remaining in place in a fixed pose would detract from any illusion of life rather than contribute to it, so they two were dropped.


Once the final rough idea was presented and okayed, I set about measuring every detail of the space I would be working in, which was crucial, obviously. It was then that I learned that there was actually less room than there appeared to be. The maximum height for any object was four feet, and there were lights to consider as well. Once this was done, I was ready to start building the elements of the installation.
Thursday, September 21, 2006

Children's Books Display - Part 1


After toiling away for the past month and a half, or so, the installation piece I created for the Shaman Drum Bookshop is finally completed and installed.

It took about seven and a half hours to install, including mishaps such as a drill battery which died less than halfway through the installation, and other tools completely left behind at home, and the single casualty seen in the bottom two photos. This monster character meant to bring up the rear, behind the robot, snapped off at the ankle. It's an easy repair job, and I'm glad that this was the worst damage to happen.

In addition to the main diplay itself, I also put up an accompnying window display seen here. The monkey in the window, and, perhaps, the boy will be moved to the main installation at the end of October. The monster from "Space Giants" my son has claimed for his bedroom, though I thought ebay would be a better home for it.


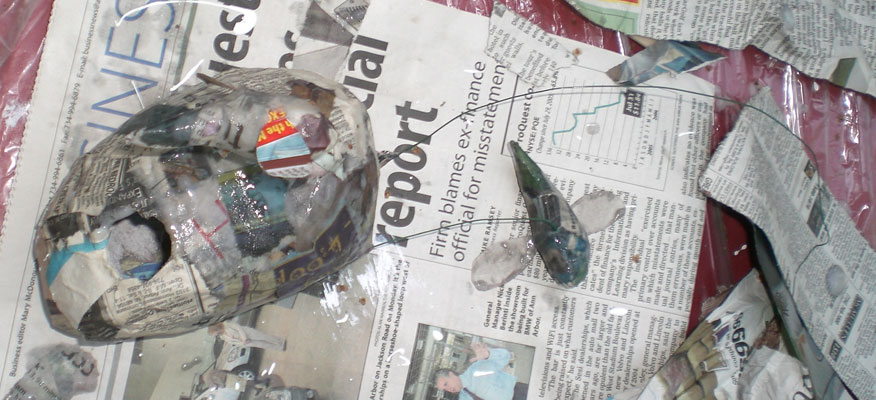
Beginning tomorrow, I'm going to start posting the step by step process in creating this piece from the sketch shown here, to the final installation. There will be plenty of detailed pictures as well, so you'll get a better look at everything.
Tuesday, September 19, 2006

Curious George

Here's a collage I did about a month ago of an iconic image from the book "Curious George." I've found myself increasingly irritated by George being constantly referred to as the curious little monkey, because he's not a monkey, he's an ape.

Just one of my little pet peeves.

Wednesday, September 13, 2006

Pee-Wee's Playhouse Turns 20!!


Today, one of the greatest television shows of all time turns 20 years old, making me feel old considering I watched this in college. For this entry I'd have loved to written an essay truly worthy of this moment, dig into my collection of Pee-Wee memorabilia, and rare images, and created a panaromic collage of the playhouse and it's inhabitants, but I can't (see my previous post for why not). So no odes to Jambi, Reba, Zyzzybalooba, or that French guy singing the yippy-yai-yai-yai-yippy-aye song, which still gets stuck in my head two decades later. No reminders that this show launched the careers of Laurence Fishburne and Rob Zmbie (to name 2). No nothing.

Let me just say thank you to Paul Reubens, and to all his collaborators, and to the tv executives who were smart enough to let him do what he wanted.

The only thing that would make this day perfect is if someone would tell me when that deluxe box set of the entire show is coming out on DVD. The bare bones version is fine and all, but I want more.

Here's a link to the official site .

Do yourself a favor and watch some Pee-Wee's Playhouse today.